Quebec’s winter and its short days turn our apartments into a survival challenge for tropical plants. Rather than simply “reducing watering,” this guide teaches you how to become an environmental engineer for your home. You will discover how to compensate for the lack of light without turning your living room into a laboratory, counter the dry air from heating, and protect your plants from the thermal shock of windows, ensuring their vitality until the return of spring.
The scene is familiar to every Quebec city dweller. It’s barely 4 p.m. in November, darkness has already settled over the alleyway, and your magnificent Monstera, which gave you new fenestrated leaves every week in July, seems frozen in time. A vegetal sadness sets in, mirroring our own lack of vitamin D. We then turn to the usual advice: water less, don’t fertilize, pray for spring to arrive quickly. These tips, while correct, are only the tip of the iceberg. They treat the symptoms without addressing the root cause: our apartments become hostile environments for living beings designed for the tropics.
The real challenge is not to passively wait for better days. The key is to move from the role of a simple plant “sitter” to that of a true “survival engineer” of your indoor microclimate. It’s not about having a green thumb, but about strategically understanding and manipulating the three pillars of winter survival: light, temperature, and humidity. Forget one-size-fits-all solutions. What if the real key wasn’t to water less, but rather to recreate a bubble of stability for your plants, despite the climatic chaos outside?
This article is your game plan. We will break down, problem by problem, the challenges of winter in an apartment and provide concrete, realistic solutions. From selecting grow lights that don’t ruin your decor to protecting your plants from the freezing cold of your windows, you will learn to transform your home’s constraints into an ecosystem where your plants can not only survive but also stay healthy until the next thaw.
To navigate through these survival strategies, here is an overview of the missions that await you. Each section addresses a specific challenge of the Quebec winter and gives you the tools to overcome it, transforming your home into a haven of peace for your green roommates.
Summary: Surviving the Quebec Winter: The Game Plan for Your Tropical Plants
- Why has your Monstera stopped making holes in its leaves since October?
- How to integrate grow lights without turning your living room into a laboratory?
- ZZ plant or Snake Plant: which survives better in a windowless hallway?
- The mistake of leaving your plants on a poorly insulated windowsill in January
- When and how to humidify your plants to counter the dry air of electric heating?
- Which plants absorb humidity and purify the air in your windowless bathroom?
- How to integrate an indoor water wall without risking mold or water damage?
- How to start a productive vegetable garden in Quebec when you’ve never planted a seed?
Why has your Monstera stopped making holes in its leaves since October?
If your Monstera deliciosa, once so prolific, has only been producing small, solid leaves since Thanksgiving, don’t panic. It’s not your fault, but a simple matter of physics. The production of large, fenestrated leaves (with holes) is a sign of maturity and vitality, directly linked to the energy the plant can produce. This energy comes from photosynthesis, which depends on light. The fundamental problem with the Quebec winter is that, as emphasized by experts from Espace pour la vie Montréal, from November to February, light intensity is considerably reduced and days are shorter. Your plant enters “photosynthesis in power-saving mode.”
This dormancy phenomenon is a survival strategy. The plant reduces its metabolism to conserve resources while waiting for more favorable conditions to return. Less energy means no spectacular growth, and therefore, no majestic new leaves. This is also why you must reduce watering. With a slowed metabolism, water needs decrease drastically. Continuing to water at the same rate as in summer is the perfect recipe for root rot.
Another aggravating factor is humidity. The dry air in our apartments, heated by electricity, stresses tropical plants accustomed to a humid atmosphere. According to Health Canada recommendations, the ideal humidity level in a home should not drop below 30%. However, in winter, it is not uncommon for it to drop well below that, which can cause the tips of the leaves to turn brown. For a healthy environment, both for you and your plants, aiming for a stable humidity level is crucial.
In summary, your Monstera isn’t sulking; it’s hibernating. It devotes all its energy to surviving, not flourishing. The solution is not to force it, but to support it by offering a stable environment with just enough light and humidity to get through the winter unscathed. Your reward will come in the spring, when the light returns and it starts producing its beautiful, holey leaves again.
How to integrate grow lights without turning your living room into a laboratory?
The idea of installing grow lights often evokes images of basements with purple lighting and a clandestine laboratory feel. Fortunately, technology has evolved. Today, it is entirely possible to provide vital supplemental light to your plants without sacrificing the aesthetics of your living room. The secret lies in choosing the right technology and its discreet integration. Forget industrial panels; think supplemental lighting strategy.
The simplest and most discreet option is to replace the bulbs in your existing fixtures (reading lamps, pendants over a corner of the room) with full-spectrum LED grow bulbs. These bulbs emit a natural white light, indistinguishable from a classic bulb, but provide the light spectrum necessary for photosynthesis. You thus give your Fiddle-Leaf Fig its daily light bath without anyone noticing.
For more targeted lighting, adhesive LED strips are an ingenious solution. They can be hidden under shelves, inside a bookshelf, or along a window frame. They allow you to create lit zones for groups of small plants (succulents, pothos) without cluttering the space. A programmable timer is your best ally here: set a cycle of 12 to 14 hours of light per day to mimic a natural cycle and completely automate the process.
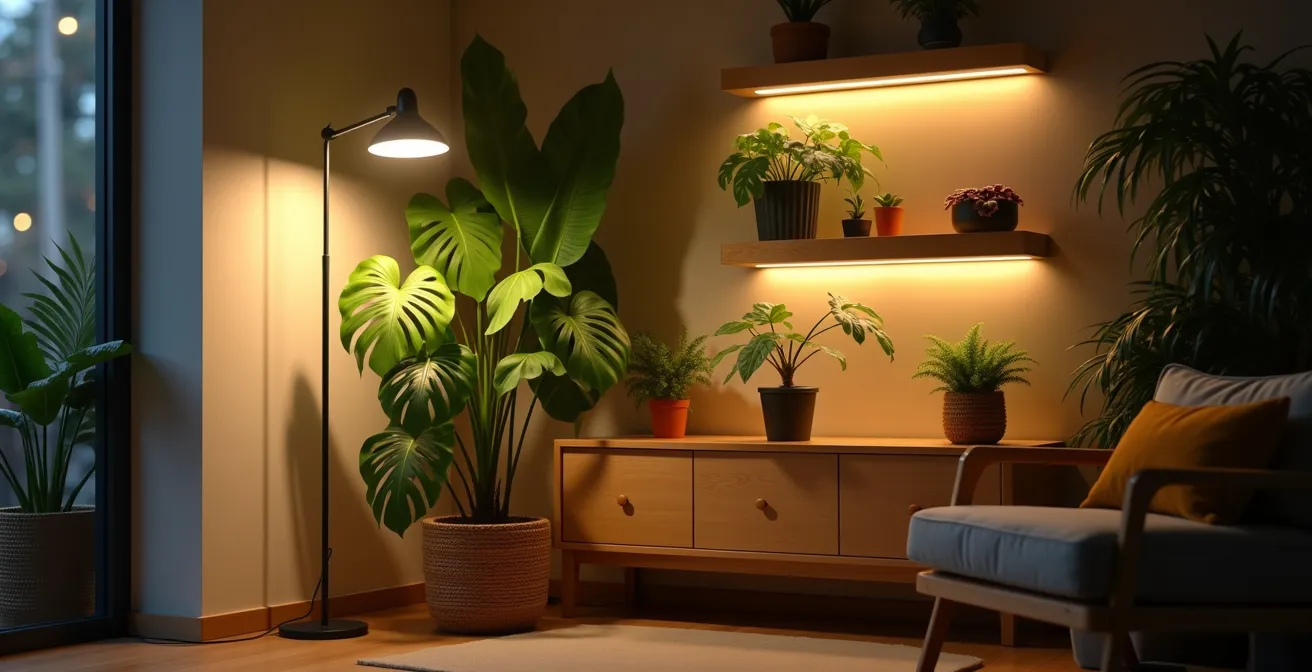
As shown in this image, the modern design of grow lights allows for harmonious integration. An elegant floor lamp can be equipped with a specialized bulb, or discreet spotlights can be oriented toward a green wall. The goal isn’t to flood the room with light, but to create functional light islands that showcase your plants while complementing your decor. Survival engineering is also about thinking about aesthetics for long-term enjoyment.
ZZ plant or Snake Plant: which survives better in a windowless hallway?
This is the ultimate scenario for the space-and-light-starved urbanite: that long hallway or corner of a room that never sees direct daylight. The temptation is great to place a plant there to green the space, but which one should you choose to avoid certain death? Two low-light champions often go head-to-head: the ZZ Plant (Zamioculcas zamiifolia) and the Snake Plant (Dracaena trifasciata). The answer is not so much “which survives better” as “how to make them both survive.”
Both plants are renowned for their shade tolerance, but there is a crucial nuance: shade tolerant does not mean “no light.” They can survive with very little light, but they will not thrive and will eventually decline if left indefinitely in complete darkness. The ZZ Plant, with its rhizomes that store water and energy, has slightly superior endurance in near-total darkness. The Snake Plant will tend to etiolate (stretch and pale) a bit faster in search of light.
The true winning strategy for these spaces is not the choice of plant, but the implementation of light rotation. No plant can survive indefinitely without photosynthesis. The solution is to own two “shade” plants and alternate them. While one spends one to two weeks in the dark hallway, the other “recharges” in a brighter room (near a north or east-facing window, for example). This method allows each plant to rebuild its energy reserves before returning “to the front.”
Your Action Plan: Light Rotation
- Exposure Phase (1-2 weeks): Place your plant (ZZ or Sansevieria) in the hallway or dark corner.
- Recharge Phase (1 week): Move the plant near a source of indirect light (north or east window) so it can regain its strength.
- Active Observation: Monitor for signs of stress like etiolation (stems stretching unnaturally) or loss of vibrant color.
- Schedule Adjustment: If a plant shows signs of weakness more quickly, shorten its period in the dark.
- Specimen Choice: Prioritize mature, well-established plants that have more reserves to handle these cycles.
By adopting this active management, you are no longer wondering which plant to sacrifice, but how to maintain a duo of survivors in perfect health. This is the very essence of plant survival engineering in an apartment.
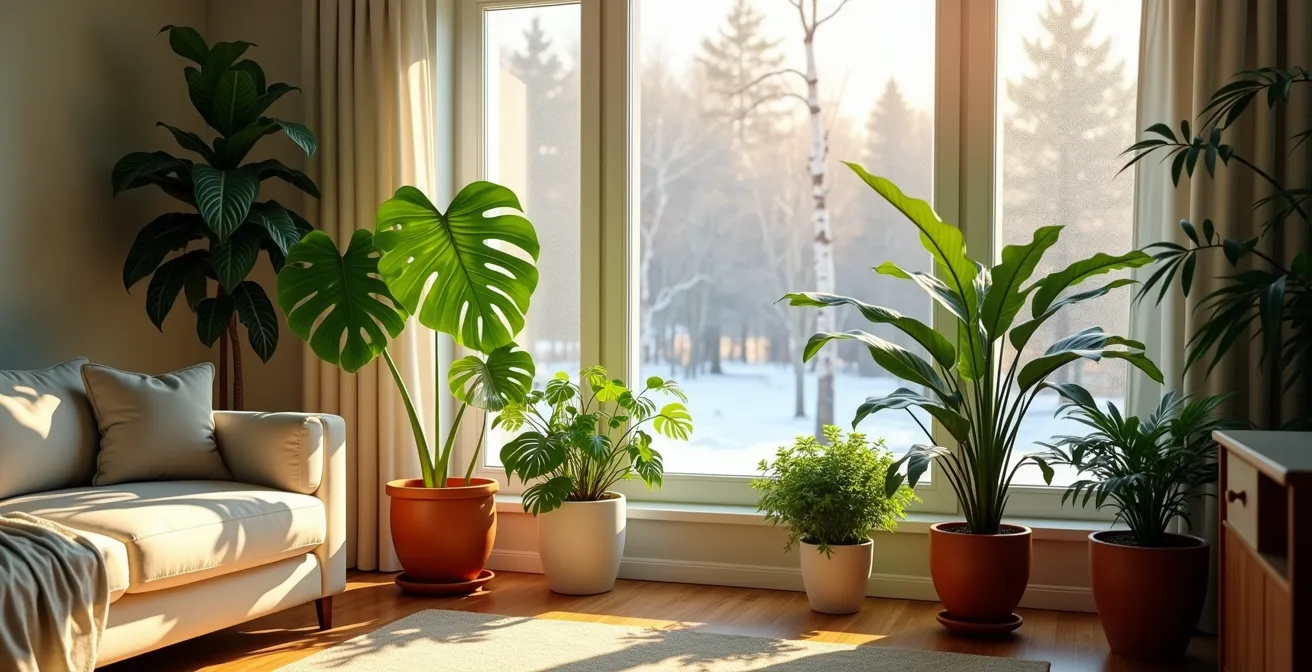
The mistake of leaving your plants on a poorly insulated windowsill in January
In winter, instinct pushes us to move our plants closer to windows, the most precious source of light. This is a good intention that can, however, turn into a deadly trap. A windowsill in the middle of January in Quebec is an extreme microclimate zone, and leaving a tropical plant there without protection is a classic mistake. The problem isn’t so much the draft as the thermal shock through contact and radiation.
A window, even double-glazed, becomes a freezing surface when the outside temperature plunges. Technical data shows that on a day when it is -25°C outside, the inner surface of a window can easily drop to 5-10°C. For a tropical plant whose roots are used to a constant, warm soil temperature, this cold is a brutal shock. Direct contact of the pot with the freezing ledge can freeze the roots, while leaves touching the glass can suffer cold burns, discolor, and die.
It is therefore imperative to create a buffer zone. The simplest solution is to maintain a distance of 10 to 15 centimeters between the plant and the glass. Never let the foliage touch the glass. For tenants who cannot change their windows, temporary insulation solutions are very effective. You can install transparent insulating plastic film on the window frame, which creates a protective air layer. Placing a thin sheet of Styrofoam or a cork mat under the pots is also an excellent way to insulate the roots from the cold of the ledge.
Also, consider the type of pot. Terracotta pots are porous and cool down very quickly. In winter, favor ceramic, wood, or plastic cache-pots that offer an additional layer of insulation. At night, when the temperature drops even further, don’t hesitate to move the most fragile plants away from the window and bring them back in the morning. Managing your plants’ environment also means anticipating these extreme temperature variations unique to our climate.
When and how to humidify your plants to counter the dry air of electric heating?
The whistle of electric heating turning on is the soundtrack of the Quebec winter. While it keeps us warm, it also turns the air in our apartments into a veritable desert for tropical plants. Dry air is enemy number one: it accelerates the evaporation of water from the leaves, causing the tips and edges to turn brown, and can promote the proliferation of pests like spider mites. The goal is therefore to recreate a bubble of humidity around your plants. But not all methods are equal.
The most commonly cited method, manual misting, is actually the least effective. It offers temporary relief for a few minutes but does not sustainably change the ambient humidity level. It’s a pleasant gesture, but more of a ritual than a real strategy. For a real impact, you must turn to more passive and constant solutions.
The simplest and free strategy is grouping your plants. Plants release moisture through a process called transpiration. By grouping them, you create a more humid microclimate where they mutually benefit from their collective transpiration. This is an excellent example of plant synergy. Another low-cost method consists of placing pots on trays filled with clay pebbles or stones and a shallow layer of water. The water evaporates slowly around the plant, increasing local humidity without the roots soaking in water.
For those looking for a more global and effective solution, investing in a humidifier is the best option. It allows for precise control of the humidity level in an entire room. The following table compares different solutions to help you choose the one best suited to your needs and budget.
| Solution | Effectiveness | Cost ($) | Maintenance |
|---|---|---|---|
| Ultrasonic Humidifier | Very effective | 50-200 | Mandatory weekly cleaning |
| Plant Grouping | Moderate | Free | None |
| Pebble Trays | Low to Moderate | 5-20 | Regular water refills |
| Bathroom Strategy (after shower) | Occasional but effective | Free | None |
Choosing the right method, or a combination of several, will allow you to effectively counter dry air and offer your plants a much more comfortable environment to get through the winter.
Which plants absorb humidity and purify the air in your windowless bathroom?
The windowless bathroom is another classic challenge of the urban apartment. It’s a paradoxical environment: very humid after a shower, but often completely dark the rest of the time. The idea of installing a plant there to absorb excess humidity and add a touch of life is excellent, but the lack of light is a major obstacle. The key to success is choosing a plant that tolerates both high humidity and very low light, and giving it a little help.
The undisputed champions for this type of environment are plants that, in their natural habitat, grow under the dense canopy of tropical forests. The Pothos (Epipremnum aureum) is probably the best candidate: it is virtually indestructible, loves humidity, and can survive with very little light. The Spathiphyllum (Peace Lily) is another excellent choice, as it has the advantage of producing pretty white flowers even in low light conditions and clearly indicates when it is thirsty by drooping its leaves. Finally, certain varieties of ferns, such as the Boston fern, thrive in humidity and dim light.
However, even these shade warriors need a minimum of light to survive long-term. Leaving the bathroom door open as much as possible to catch ambient light from the rest of the apartment is a first step. But for a sustainable solution, survival engineering must take over. The most effective strategy is to integrate an artificial light source directly into the room. Here are some practical options:
- The Grow Bulb: Simply replace the bulb in your vanity fixture with a full-spectrum LED grow bulb.
- The Timer: Plug this fixture into a timer and program it to stay on for 12 to 14 hours a day. Your plant will receive its daily light quota without you having to think about it.
- Rotation: If installing a dedicated bulb isn’t possible, apply the same rotation strategy as for the hallway, alternating the bathroom plant with another placed in a brighter spot.
By combining an adapted plant and a supplemental lighting strategy, even the darkest bathroom can become a small, functional green oasis.
How to integrate an indoor water wall without risking mold or water damage?
The indoor water wall is a fantasy for many plant lovers: it evokes a spa atmosphere, a soothing sound, and a promise of constant humidity for our tropical friends. However, in the context of a Quebec apartment in winter, this is an installation that can quickly turn into a nightmare if not perfectly mastered. The primary risk is an excessive increase in relative humidity, leading to condensation on cold walls and windows, and potentially the appearance of mold.
The golden rule is control. A water wall evaporates a large amount of water into the air. If your apartment is already well-insulated and poorly ventilated, the humidity level can skyrocket. The Institut national de santé publique du Québec is very clear on this point. As one of their reports points out:
The humidity level should never exceed 45% in winter in extremely cold regions to prevent condensation.
– Institut national de santé publique du Québec, Recommended relative humidity ranges
Exceeding this threshold is an invitation for trouble. Before even thinking about a water wall, it is therefore essential to equip yourself with a hygrometer to know the base humidity level of your home. If you are already near 45%, a water wall is a very bad idea. It is also crucial to ensure good ventilation, either through an air exchanger or by manually airing out for a few minutes each day, even in winter.
Fortunately, there are safer alternatives to achieve a similar goal without taking disproportionate risks. These solutions allow for increasing humidity in a more localized and controlled manner. The following table presents some safer options than the traditional water wall for an apartment.
| Alternative | Risk | Cost ($) | Effectiveness |
|---|---|---|---|
| Console Humidifier | Low | 200-500 | Excellent for large rooms |
| Multiple Humidity Stations (several small humidifiers) | Very Low | 50-100 | Good for localized zones |
| Closed Indoor Fountain | Low if well-maintained | 100-300 | Moderate, decorative |
| Green Wall with Drip Irrigation | Moderate | 500-2000 | Good, natural aesthetic |
Unless you live in a massive loft with excellent ventilation, it is often wiser to turn to these alternatives. They offer the benefits of humidity without the risk of turning your urban jungle dream into a health and safety issue.
Key Takeaways
- Light is key: In winter, the lack of light is the number one limiting factor. Compensate with grow lights or a strategic rotation.
- Manage humidity actively: Dry air from heating is an enemy. Group plants, use pebble trays, or invest in a humidifier.
- Watch for thermal shock: Never forget that the windowsill is a freezing zone. Isolate your plants from direct cold.
How to start a productive vegetable garden in Quebec when you’ve never planted a seed?
Once you’ve mastered the art of keeping your tropical plants alive through the winter, a new desire may arise: what if we produced something edible? Starting an indoor vegetable garden in Quebec, even in the dead of winter and without experience, is not only possible, it’s also an excellent way to create a beneficial synergy with your existing indoor plants. The secret is to start small, with easy varieties, and use the knowledge you’ve already acquired.
No need for complex equipment to start. The same grow lights you use for your Monstera will work perfectly for aromatic herbs or microgreens. The idea isn’t to aim for self-sufficiency, but the pleasure of adding a pinch of fresh parsley, grown by yourself, to your dishes in February. To set yourself up for success, start with these sure bets:
- Easy Herbs: Basil, parsley, dill, and chives are excellent starting points. They germinate quickly and only require good lighting and regular watering.
- Microgreens: Radish, broccoli, sunflower… Microgreens are the instant gratification of the indoor gardener. Ready in 7 to 14 days, they are nutritious and delicious.
- Local Seed Companies: For high-quality seeds adapted to our climate, turn to Quebec companies like Les Jardins de l’Écoumène or Semences du Portage.
- Turnkey Systems: If you want an even simpler solution, hydroponic systems like Aerogarden automate lighting and watering, making failure almost impossible.
The most interesting advantage of this project is the group effect. By adding a small herb garden next to your tropical plants, you increase the overall plant mass. The more plants there are, the more the ambient humidity naturally increases. A study on indoor plant care reveals that up to 97% of irrigation water is released into the air through transpiration. Your vegetable garden will therefore actively help your Calatheas and Alocasias better withstand the dry winter air. It’s a virtuous circle: you take care of your vegetable garden, which in turn takes care of your other plants.
Starting an indoor vegetable garden is not a new chore, but a logical extension of your passion. It’s the next step in your journey as a microclimate engineer, a delicious and productive way to bring even more life into your home during the long winter months.
Now that you hold the strategies to transform your apartment into a green oasis, even in the heart of winter, the next step is to take action. Don’t try to change everything at once. Choose a single new habit from this guide and apply it today to start seeing the difference.